


Now that we’ve deployed our ISE nodes, established our personas, and joined them together in a clustered deployment, we’ll take a close look at the next steps in getting an Active Directory integrated 802.1X deployment going!
The Scenario..
In our last entry we deployed a medium-sized Cisco ISE “cube”. We left off there after we got the basic connectivity established between the nodes and assigned them their respective personas. In this entry, we will pick up right where we left off by walking through the process of joining our new ISE deployment to an Active Directory domain as well as have a quick chat about the server certificate used by our ISE deployment for secure EAP communication with the 802.1X supplicants connecting to our access networks. In this scenario, we will be leveraging the two most popular Windows Security Groups to role-based access to the network; Domain Users and Domain Computers. So....let’s go!
Joining ISE to Active Directory
First off, as my 3-year-old would ask (a thousand times), “why”? I thought you’d never ask. Microsoft Active Directory is the de facto standard directory service in the market, and as such you probably already have it deployed in your environment for managing user/computer accounts, etc. You already manage your domain user/computer accounts through Active Directory, with role-based access control (RBAC) configured by way of Windows Security Group membership. One of the major benefits of deploying ISE (and 802.1X) is to carry that role-based access control model into the network itself! So, now I ask you...why wouldn’t we want to leverage an existing external directory that has already done the hard part of creating the user/computer accounts and assigning them to their appropriate roles? Sure, we could recreate all of our accounts locally on ISE and assign them to RBAC groups locally on ISE, but again, why? It is done for us already!! Hallelujah. If you find yourself in the small minority of organizations not using Active Directory today, fear not, as ISE is capable of integrating with pretty much any directory that you use via LDAP/ODBC (but we won’t be discussing that here).
Now that we know the why behind integrating with Active Directory, onto the easy part – lets configure it!
Join ISE to Active Directory
You will need to be prepared to input two pieces of information in order to complete the join of ISE to Active Directory.
√ The Active Directory domain name!
√ An Active Directory account with Domain Admin rights!
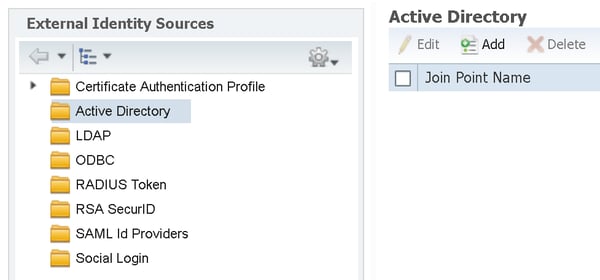
The Domain Admin credentials will only be input once to authorize ISE to join the domain. They will not be cached on ISE. Now that we have the information we need, let’s do it! Login to the ISE Primary Administration Node (PAN) and navigate to Administration > Identity Management > External Identity Sources > Active Directory. Click Add.
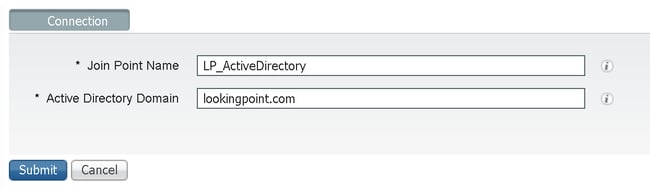
Next, fill out the connection information. The “Join Point Name” is locally significant on ISE and can be changed at any time. This name will show up in other ISE configuration menus where External Identity Sources are referenced. Pop in your AD Domain and click submit!

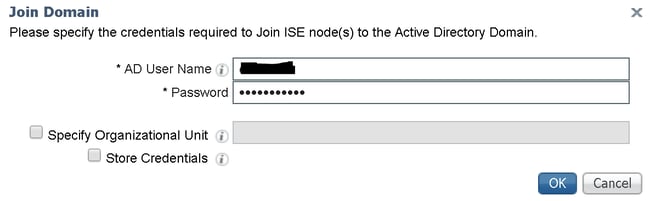
Yes! We would. Click yes at the pop-up (shown above). This will result in the pop-up shown below requesting an AD User Name and Password. This will be the account with Domain Admin level privileges (so that we can add ISE to the domain – this is a one-time entry, not cached). Optionally, you can specify a non-default OU that you would like to place the ISE nodes under in Active Directory (if your in to that sort-of thing). Leave the “Store Credentials” unchecked. This relates to ISE Passive ID setup, which is unrelated to what we are trying to accomplish in our scenario. Click OK!
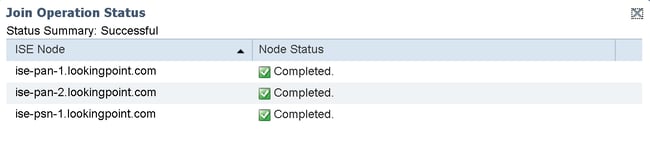
The following pop-up will ensure you that the join operation completed successfully. Click close. Stay on the resulting screen and proceed!
Add Active Directory Groups to ISE
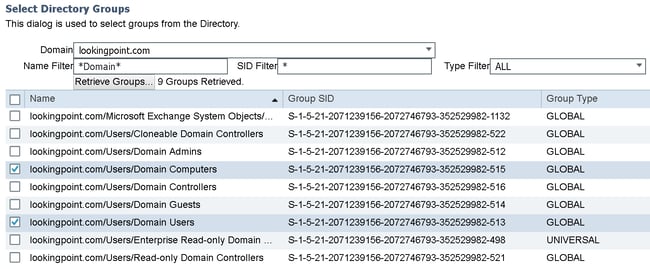
Now that we’ve joined ISE to the AD domain successfully, we need to pull in the AD Groups that we want to be able to reference in our policy conditions. Navigate to the Groups tab and click Add > Select Groups from Directory.

At the resulting pop-up, search for the group[s] you want to add into ISE for policy reference. In our case, we are adding just Domain Users and Domain Computers. Click OK, then click Save.
Active Directory configuration completed! High-five! There are more nerd knobs in there to play with, but for the sake of brevity we’ll avoid getting into that for now. For the basic 802.1X deployment we are walking through in this series, we don’t need the advanced settings anyhow. Some parting thoughts on Active Directory and ISE.
√ ISE can leverage any two-way domain trusts that exist on the domain it is joined to.
√ ISE can selectively enable/disable authentication for any domain in the forest.
√ ISE can join multiple AD domains at the same time!
√ In addition to using AD Groups in ISE policy sets, you can also use AD Attributes.
That’s all for now relating to AD. In our next entry, we will build out a policy set for a basic 802.1X deployment that references the configuration we completed here.
ISE EAP Certificate
Okie-doke! As a next step in completing our basic 802.1X deployment, we need to assign an authentication server certificate (AKA “EAP Certificate”) to ISE to use for identification and encryption purposes during authentication with the 802.1X supplicants. We covered 802.1X previously. For a refresh on 802.1X, click here. For a refresh on EAP, click here. For a refresh on Microsoft Native 802.1X supplications, click here. In the last blog post when we built our ISE deployment, we had to create a certificate for the ISE nodes to use for securing their inter-node communications. That certificate was called the “Admin” certificate. Now because we are smart cookies, we had that certificate issued from a well-known public CA and leveraged ISE’s support of wildcard certificates so that we could use the same certificate on every ISE node. So, can we use that same certificate as our “EAP” certificate? Yes. Can we use the same certificate for pretty much everything we need certificates for on ISE? Yes, pretty much. Should we? I think so! Great, glad we had that talk. The other thing to keep in mind here is that we can only have one/uno/a single certificate assigned to the EAP. This means that if we ever want to support 802.1X from supplicants that we do not control the CA trust store on (mobile devices, MacBooks, etc.), we should go ahead and use a well-known public CA signed certificate for our EAP cert (which we did!).
Configure EAP Certificate
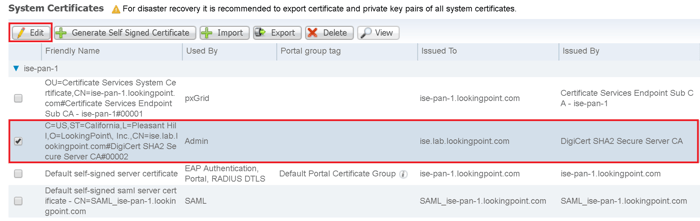
Leveraging our glorious certificate from the last blog entry, we will enable it for EAP usage. Navigate to Administration > System > Certificate Management > System Certificates. We’ll check the box next to the certificate we want to add EAP usage to and click edit.
Scroll down to the “Usage” section and check the box next to EAP Authentication. Click OK at the resulting pop-up warning, then click Save. This will make the update to all the nodes in the deployment that share that certificate.
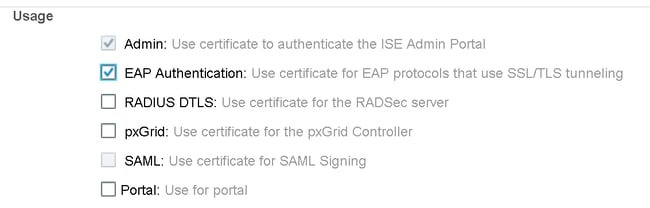

We can now see that our previously admin only certificate has now been updated to be used for EAP Authentication! This will now be the certificate that is presented to the 802.1X supplicants during EAP authentication. Whoop whoop! Great work!
What’s Next?
In our next entry we will take a close look at configuring a policy set for basic 802.1X authentication using the AD Groups we’ve configured here today and then we’ll actually connect an endpoint to the network and see what happens.

Check out our awesome tech talk on ISE:
Written By: Dominic Zeni, LookingPoint Consulting Services SME - CCIE #26686
If you are interested in LookingPoint installing ISE into your network, feel free to contact us here!
