


So, you’ve verified your firewall appliance is allowing your application traffic, you’ve ensured your routers are getting the traffic where it needs to go, and your access control lists on your switches are perfect. A packet cap on your switch shows the traffic getting to your Windows server. Why isn’t it working? I’ve run into the Windows server itself blocking traffic destined to its own applications far too often, and it has taken me more time than I’d like to admit to come to that conclusion. In this blog, I’d like to show you some of the techniques I use to troubleshoot when the only thing that makes sense is that the Windows OS itself is keeping me from success in my struggle. I’m hoping the time I spent learning this gives you a shortcut to success!
The two Windows technologies we’ll be exploring are Windows Filtering Platform (WFP) & Windows Firewall with Advanced Security (WFAS). WFP (Microsoft link here) is a set of API and system services for creating network filtering applications. It’s mainly leveraged by developers who design Windows applications, and something running on your machine may be utilizing it without your knowledge. WFAS (Microsoft link here) is far more well-known and you may already be familiar with it. In any case, let’s step through a few scenarios.
WFAS
WFAS is More common, and it has a GUI, so let’s start there. I’ll show you the CLI afterwards (but it’s much faster).
GUI Logging
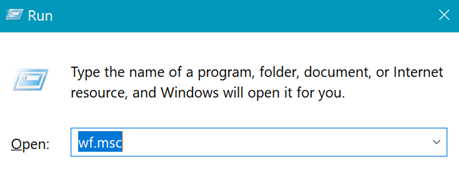
I open Windows Firewall by pressing CMD+R, then typing wf.msc
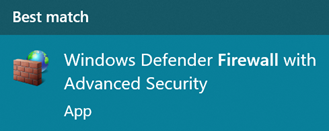
If you’d prefer, you can just search for “firewall”, click the icon pictured below, then click on Advanced settings.

Checking Logs
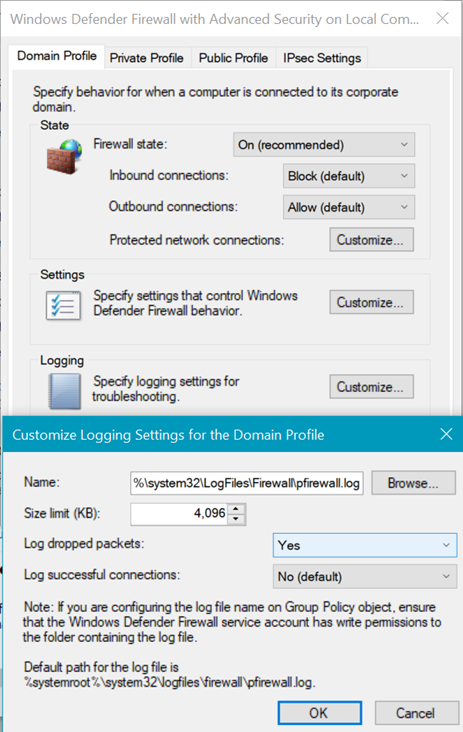
We can log dropped packets in our firewall log by going to the firewall properties and customizing the logging settings per profile. As you go through the steps, (unless it was changed) you’ll see the default log for all profiles is %systemroot%\system32\LogFiles\Firewall\pfirewall.log. If you want to turn dropped packet logging on for all profiles, you’ll be checking the same file for output. I’ll go through one example and let you decide if you need to check the other profiles (more info on firewall profiles here).
- After WFAS is open in advanced settings, right-click on the top-level & select properties.

- Using the example of the Domain Profile, let’s click on the Customize button for Logging,
- then copy the path under name,
- change “Log dropped packets:” to Yes
- and click OK, OK.
- then copy the path under name,
- Once logging is enabled, run a test to see if you can capture the traffic being dropped.
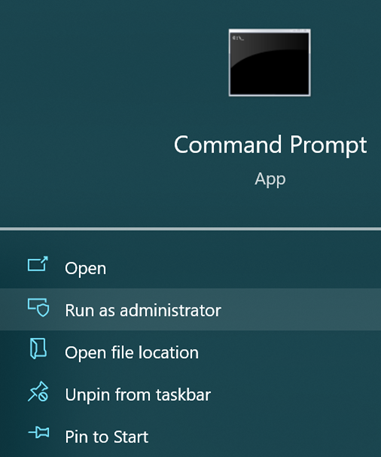
- In your Windows search, type in cmd and run as administrator.
- In the command line that opens, type notepad and paste the file path (the log file can only be opened by an administrator)

- You should see something like the following if your firewall is blocking traffic (I’ve whited out part of the source IP & the destination IP).

- It looks like I received traffic on UDP 514, but it’s blocked by the firewall!
- It looks like I received traffic on UDP 514, but it’s blocked by the firewall!
-
-
- Now that I see that, I can add a rule to allow it, or check my rule to ensure it’s configured for the correct profile, port, etc. I won’t go through that process here, but here’s a link to get you started in case you need it.
-
CLI Logging
- If you want to enable logging for all profiles, open a command prompt as an administrator (like step 4 above) and type the following line:
- netsh advfirewall set allprofiles logging droppedconnections enable
- netsh advfirewall set allprofiles logging droppedconnections enable
- Run your test, then run the same command as above in 4c:
- notepad %systemroot%\system32\LogFiles\Firewall\pfirewall.log
- notepad %systemroot%\system32\LogFiles\Firewall\pfirewall.log
- When you’re finished, you can run the following line to set it back to disabled so you’re not building logs that you won’t look at:
- netsh advfirewall set allprofiles logging droppedconnections disable
WFP
I don’t usually check WFP unless I’ve verified everything else as it’s far less common in my experience, but good to know about so you don’t end up like me pulling your hair out wondering what you missed. I’ve only worked with this from the command line, so we’ll start with an administrator command prompt again.
- Open a command prompt as administrator
- By default, you should be able to run the command below (if not, see step 3)
- Netsh wfp show netevents
- It should give you output like the following:
- Then you can run the following command:
- Notepad netevents.xml
- Notepad netevents.xml
- You should get output that looks like this:
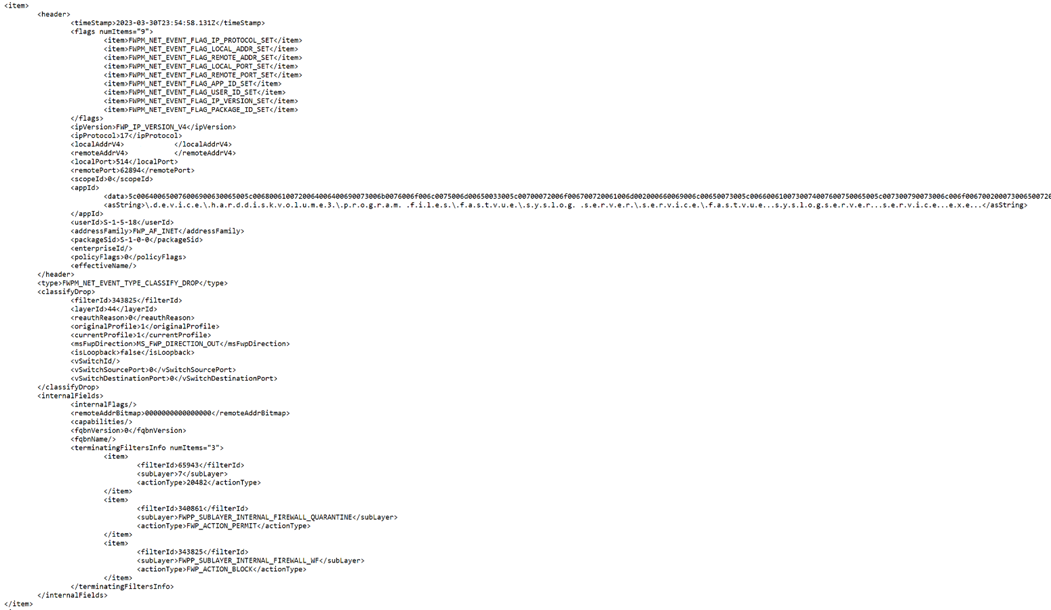
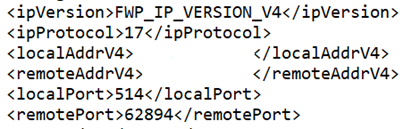
- I want to point out 2 pieces of this info to focus on. First, the IP & port information (which allows us to find what we’re looking for by either remote address or local port)
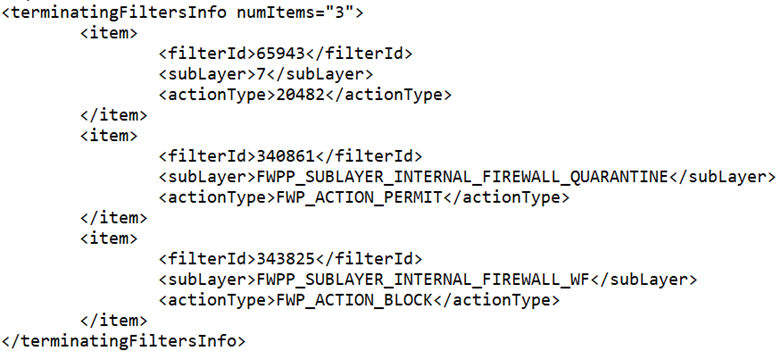
- Second, the filter information (which allows us to determine why it’s blocked)
- Now, to look up the filter information, let’s run the commands
- Netsh wfp show filters
- Notepad filters.xml
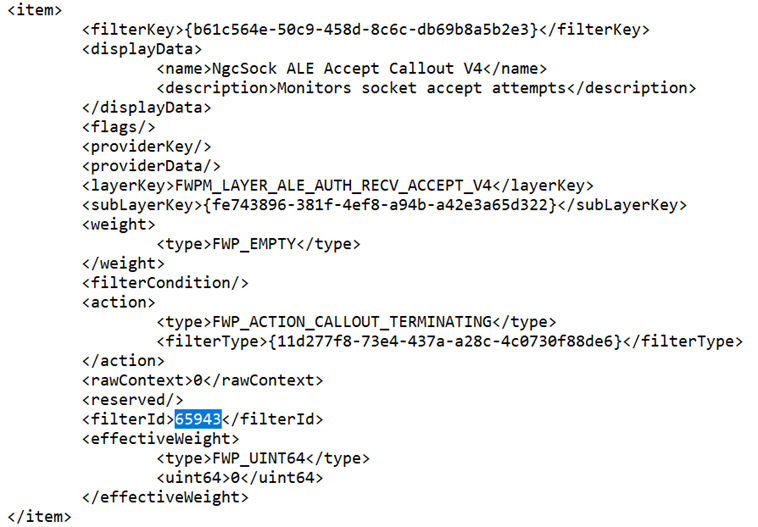
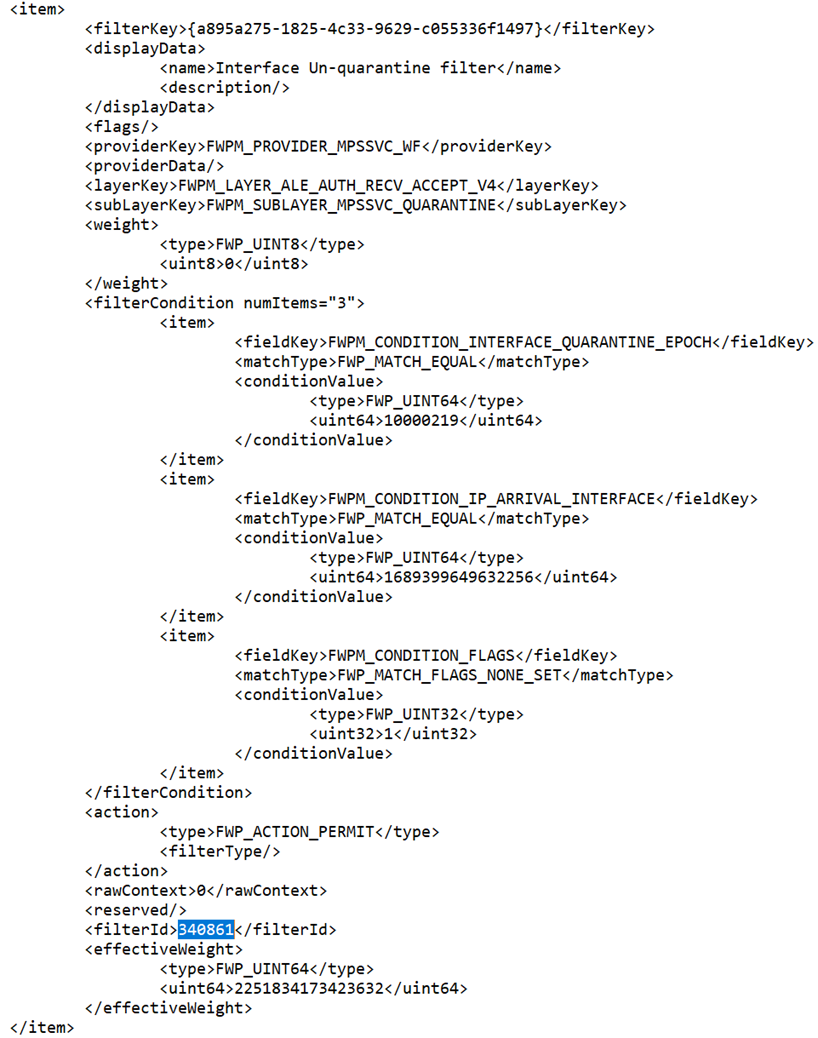
- Then we can search for all the “filterId” entries above (I haven’t found a more elegant way than to search in a text editor).
- With the information on the filters that are causing Windows to drop your traffic, you can let yourself loose on your favorite search engine and try to determine how to address, but at least you have some information to go on.
- If you get an error when running the command that looks like this

- Run this command then try step 2 again
- Netsh wfp set options netevents = ON


I would encourage you to explore netsh if you have some time. Try typing “netsh wfp ?” as well as “netsh advfirewall ?” to see the other commands available. I’m hoping this information is useful and saves someone a little time. Thanks for reading!
It just so happens that LookingPoint offers multiple IT services if you’re interested. Want more information, give us a call! Please reach out to us at sales@lookingpoint.com and we’ll be happy to help!

Ryan Alibrando, Managed Services Team Lead