


Cisco has rolled out a new way to allow customers and partners to manage software licenses. This new feature is called Smart Accounts, which lets you view and control access to all your Cisco software licenses and entitlements across your entire organization. Once you set up your Smart Account you will be able to create up to 200 sub accounts called Virtual Accounts, which allows you to organize and manage your licenses by departments, locations or types of licenses, throughout your organization. Smart Accounts allows you to have access to your licenses and software at all times, without having to rely on your provider to distribute. No more having to wait for a provider to deliver licenses and delaying projects, with your Smart Account, all your needed licenses and information are a click away.
Setting up your Smart Account as quick and easy! Below is the step by step process to get your account set up and ready to use.
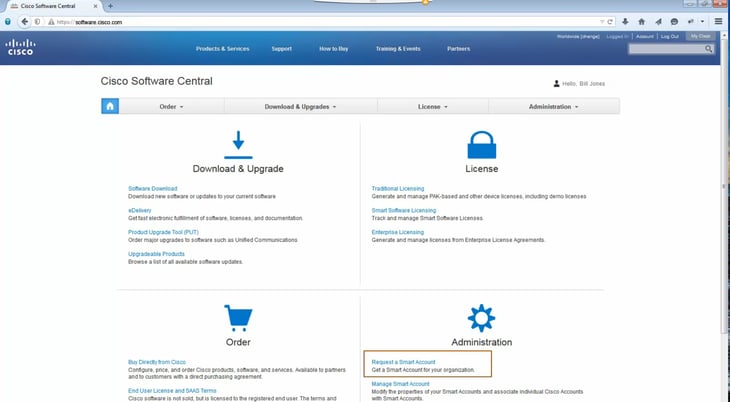
1. Log into Cisco Software Central: https://software.cisco.com
2. At the bottom right hand corner you will see “Administration”. Click on the link titled “Request Smart Account”.
3. Next the “Smart Account Request” screen will show up. If you are representing your company or organization as the administrator of the account click “Yes”. If someone else within your company or organization is administering the account, click “No” and enter their email address.
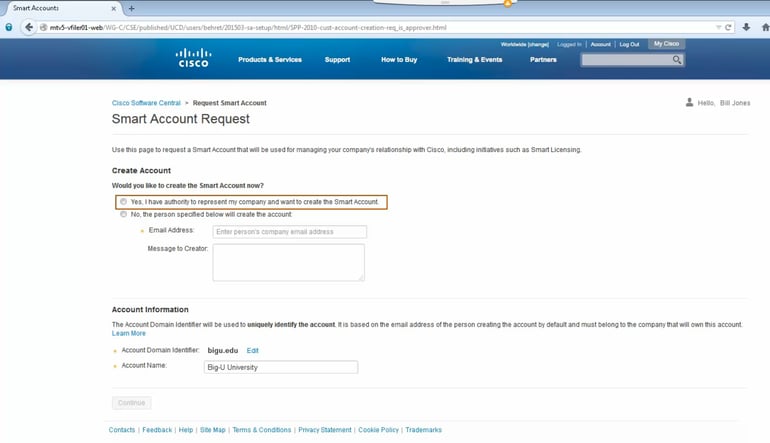
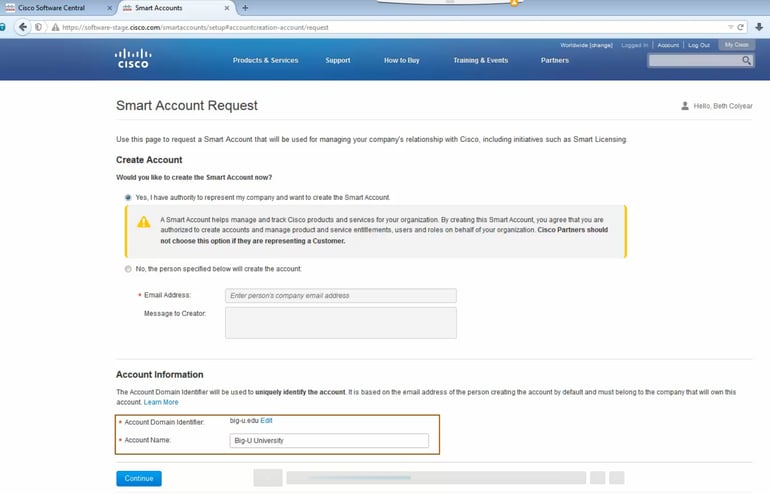
4. Your “Account Domain Identifier” should already be filled in. If it is incorrect, you will need to edit it at this time as this is the only time you will be able to. Also, you will need to enter your Account Name which should be your company or organization’s legal name.
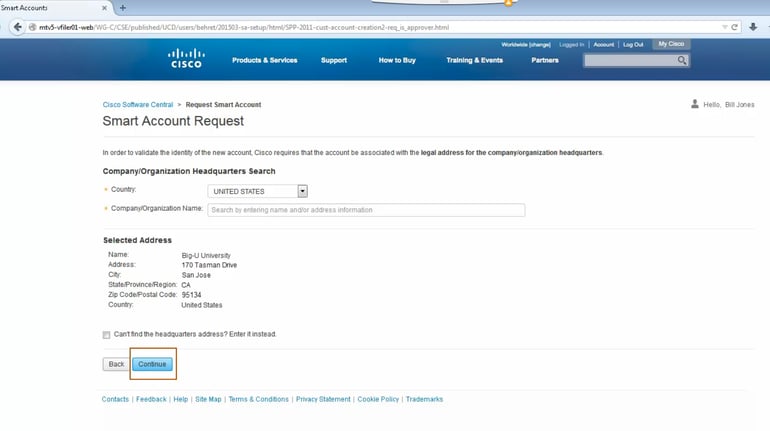
5. You will then need to select the country of the company or organization’s legal headquarters and address. You can start typing in your company’s address and the system will automatically start narrowing results if Cisco has your company’s legal headquarters’ address. If it does not populate. Click on “Can’t find the headquarters address” and enter the legal information and click continue.
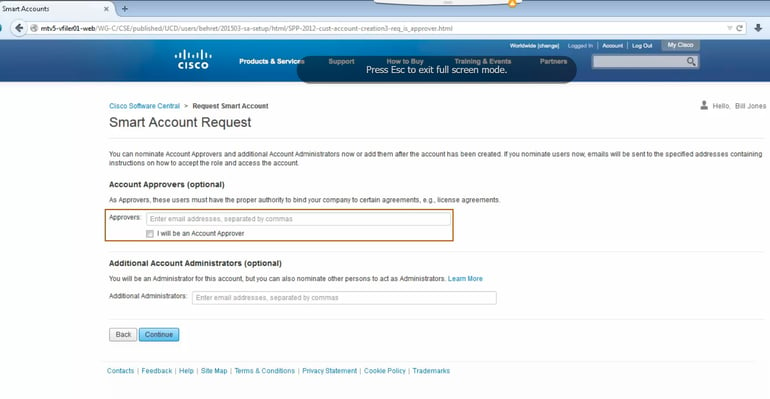
6. Next you will enter in “Account Approvers”. Enter the email address of the account’s administrator. If others in your company or organization can also approve, please enter their email address in the field below “Additional Account Administrators”.
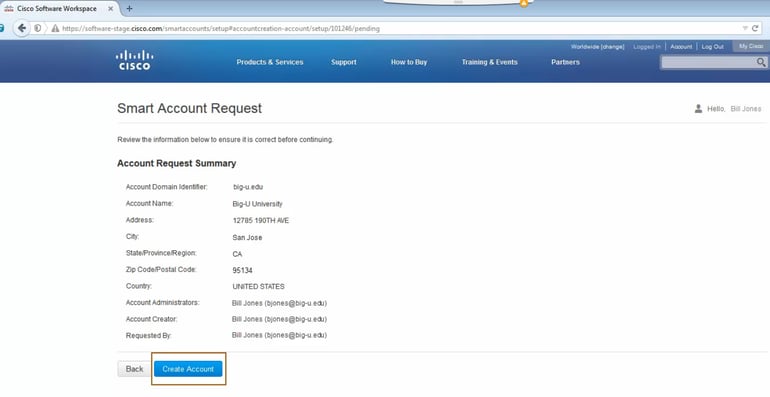
7. Finally, you will see a “Account Request Summary”. Here you are able to review the information you entered and make any last minute edits before setting up your account. If all is correct, click “Create Account”.
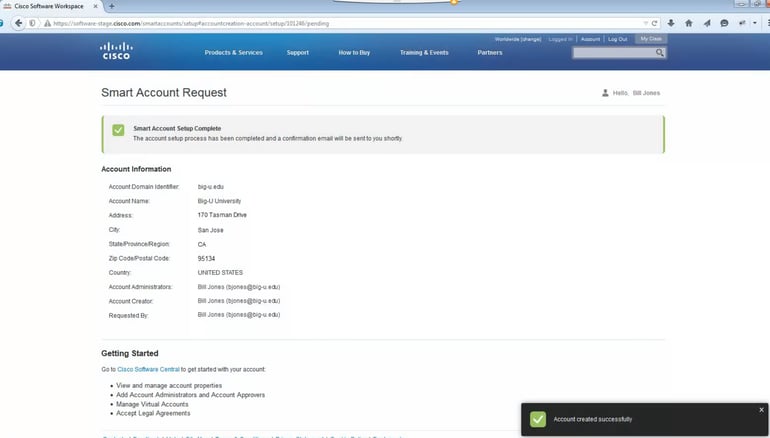
8. After you create the account, you will see a confirmation screen that shows your account has been set up. You will also receive an email with a summary of your account. From here, you can click on the link below “Getting Started” to access your Smart Account.
As of now, approximately 50% of Cisco licensing SKUS are being delivered via this new portal and their plan is to have 100% of their SKUs delivered via Smart Accounts by the end of the year. If you do not have a Smart Account set up, licenses will be deposited into your provider’s account on hold until an account is set up. Once your account is active, your provider will be able to transfer those licenses into your new Smart Account.
If you have any questions or need help setting up your Smart Account, please reach out to blanca@lookingpoint.com directly and I will be happy to help!
Written By: Blanca Cerda, Operations Administrative Assistant