


Data backup is a must in any organization big or small. Having backups in multiple remote locations means peace of mind to an admin, because he or she can rest assured their data is stored in a safe place should something catastrophic happen. Today we will be looking at how to configure remote backups for FMC, assuming you already have your remote storage location setup. Cisco best practice is to remotely backup your FMC by mounting an “SSH, SMB, or SSHFS network volume”. Although your backups will be going remote, you are still able to manage them locally through FMC. Please do keep in mind that this article pertains to a SINGLE FMC and not HA peers, as the process is a bit different. That said, lets log in to our FMC and get to work!
Part I- First thing we want to do is setup our Remote storage location on FMC. To do this, click on “System Settings” on the top right-hand corner and navigate to “Configuration”.

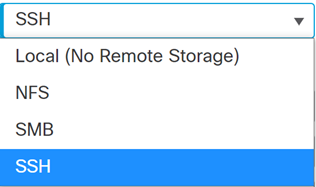
- We are now in the configuration area of the FMC. On the left-hand pane, navigate to “Remote Storage Device”, which will then present you with the “Storage type” dropdown menu as seen on the right.

- Click on the dropdown menu to see the available options. These are the Cisco “best practice”, recommended options for remote storage. In this case we will be using SSH as our protocol.

Host:
- Here, you will input the address of your remote storage, either as an IP address or a hostname. This is the location where you will be sending your FMC backups.
Directory:
- Enter the path on which the FMC backups can be found, on your remote storage.
Username:
- Enter the username you want to use to log in to your remote storage.
Password:
- Enter the password which you will be using to log in to your remote storage.
SSH Public Key:
- This field is automatically populated. Its purpose is to provide you with the option to use SSH Keys to login to your remote storage, instead of using a normal password. If you desire to use this option, you would need to copy the SSH Key and paste it in the “Authorized_Keys” file for the specific user, on the remote storage.
- After we fill out the required fields, our next step is to test connectivity from our FMC, to our remote storage location. To do this, simply click the “Test” button. If connectivity is successful, you should see a green indication message like below. Click Save.

Part II
- The second part of this configuration consists of setting up our backup Profile. The backup profile distinguishes each backup instance you create, and allows you to name each instance, so you know what is being backed up. To do this, let’s navigate to “System Settings” on the upper right-hand corner and under “Tools”, click on “Backup and Restore”.

- On this page, we are presented with system information regarding the FMC backups that have already taken place. On the left-hand side, lets click on “Backup Profiles”, to create a fresh backup instance and give it a name.

- We are now seeing a list of the existing backup profiles previously created. To create a new profile, lets click on “Create Profile” on the right.

- Now it is time to create our fresh backup instance. For this case, we named our new instance “test”. Below you have options to backup the entire FMC configuration, events only, Threat intelligence data, or if you want all of it backed up, simply check all the boxes off. The option “Copy when complete”, will allow you to send a copy of the FMC backup, to a different location, if you so desire. Make sure to Save when done.

From here, you can run a backup on the spot by clicking on “Start Backup” if you so choose to, to make sure backup will take place successfully.
Part III
1. The last part of this configuration consists of implementing a schedule as to when this backup will take place. To do this, navigate to “System Settings” once more and under “Backup and Restore”, click on “Scheduling”. You will be presented with a calendar. Click on “Add Task” on the upper right-hand corner to add a new schedule for your backup.
2. On this page we can setup our scheduled backup as we please. One very important note I would add, is to make sure the Time Zone matches with your remote storage location! I ran into an issue where the backups would fail on the specified day and later found out that the time zone set on the FMC differed from the remote location, causing the backup to run at a different time, and therefore fail. I had set the backup to run weekly at 1AM per the client’s request, the thing is, I didn’t notice it was set to 1AM EST when it SHOULD have been set to 1AM PST. In all honestly it took a couple days to realize my mistake but once I changed it to the correct time zone, the backup worked flawlessly. It’s the little things!

3. In the “Job Name” field, you can see I entered “test” which is the name I gave my backup profile. Under the “Backup profile” dropdown, you should see the name of your backup profile, choose that option. In my case when I clicked on the dropdown menu, it showed an option called “test”. Finally, when you are satisfied with your input, click Save. If you navigate back to “Scheduling” you will see your newly added scheduled backup on the calendar.
That’s it! You’ve now configured remote backups for your FMC!
I hope the information provided was helpful. If you have any further questions, please feel free to reach out to us at sales@lookingpoint.com, we would be more than happy to assist you.
Thank you!

Will Panameno, Network Engineer