


It’s that time! Get up-to-date! In this entry we will be covering a MAJOR upgrade of a two-node ISE deployment from version 2.4 to version 3.0! Before you attempt this in your environment, read all the release notes in order to confirm your unique path and requirements! Good, let’s go!
ISE Topology
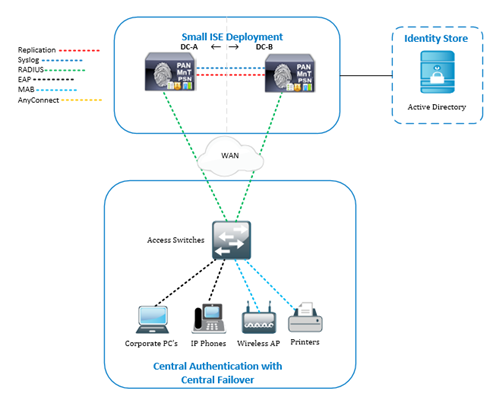
This is the two-node ISE topology, running ISE 2.4 on virtual appliances, that we will be taking to ISE 3.0! We’ve gone over the different types and sizes of ISE deployments previously. If you haven’t read that one, check it out!
Upgrade Methods
There are a few methods available to make this happen. For the details on each of these methods and why you might choose one over the other, please read this ISE 3.0 Upgrade Guide from Cisco.
|
Method |
Difficulty |
Speed |
Downtime |
Flexibility |
Rollback |
|
Backup, Reimage, Restore |
|
winner |
winner |
chicken |
dinner* |
|
In place upgrade (GUI) |
|
|
|
|
|
|
In place upgrade (CLI) |
|
|
|
|
|
|
Good |
Better |
Best |
*Rollback options are all pretty easy and robust. Some situational dependencies are baked into the opinion in here with the backup, reimage, restore option with reference to an ISE deployment on virtual machines. With the backup, reimage, restore method using virtual machines, rollback is as easy as powering on the old VM’s and re-registering the nodes to the deployment. With physical appliances, rollback using this method is quite involved.
For our scenario, we will be upgrading a two-node deployment in the middle of the day, so we want to choose a method with a quick upgrade time, offering a swift rollback plan, and no/minimal interruption to authentication services. Also, in our scenario our current virtual machine compute/storage specifications are out of line with ISE 3.0 requirements, so we’d like the flexibility of modifying our compute/storage without risking the farm! We’ll take on the added difficulty and go with the Backup, Reimage, Restore option.
Backup
First things first, backup the existing deployment data. We have three types of data to backup from our ISE 2.4 deployment prior to upgrade (we will need these things to complete the restore to ISE 3.0 later).
|
Data |
What does it do? |
|
Configuration Data Backup |
This is a (almost) complete backup of your ISE deployments configuration. It contains (almost) everything that you would need to rebuild your deployment from scratch. |
|
Operational Data Backup |
This is a complete backup of all of the authentication logs currently retained on the monitoring node of your ISE deployment. This is optional to backup, however, if you need to be able to look at logs on your ISE 3.0 deployment from authentication events that took place on your ISE 2.4 deployment from before the upgrade, you need it! |
|
System Certificates |
See the “(almost)” comment from the configuration data backup information above? The configuration data backup does not backup the system certificates used by the nodes in your deployment. You need to backup all system certificates in use (including their private keys). |
We are not using the ISE Internal CA here. Keep in mind that if you do, you will need to export the ISE Internal CA certificates as those are not included in the Configuration Data Backup either.
Configuration and Operational Data Backup
Now, if you are a good ISE administrator, you will already have backups running to an external file server on an ongoing basis. On the other hand, if you are one of those “shoot from the hip” types, you’ll need to add a new backup repository prior to proceeding.
Create the Repository
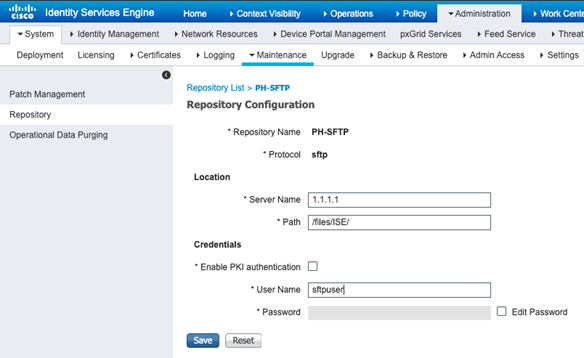
Remember that if that backup repository uses a secure protocol, you need to login to the ISE PAN CLI and run the following command.
“crypto host_key add host <IP/FQDN of file server>”
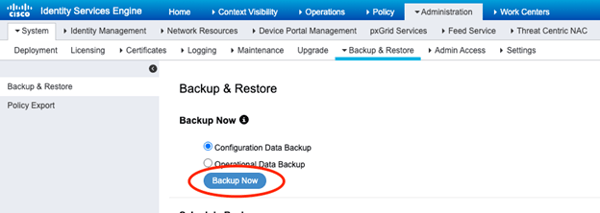
Let’s grab a Configuration Data Backup to the external repository!
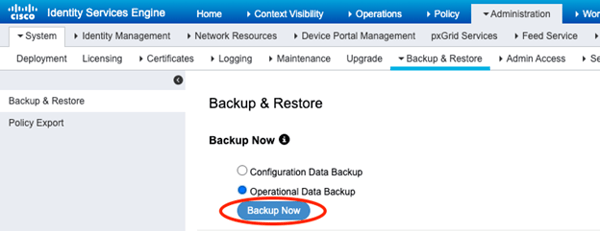
Cool, cool. Now grab an Operational Data Backup!
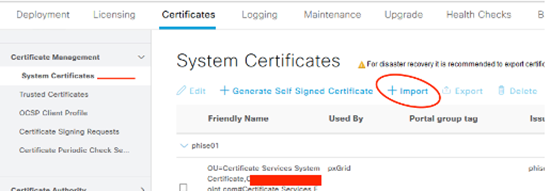
System Certificate Backup
We need to export the system certificates from each node in the deployment (unless they used a shared certificate, in which case you only need one copy of it). Don’t bother backing up certificates that you do not use. In our case, the deployment makes use of a shared, wildcard certificate.
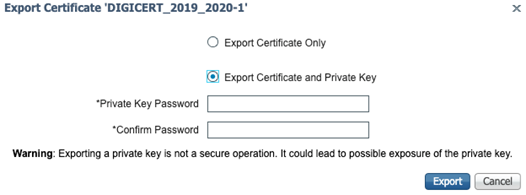
Export that Certificate!
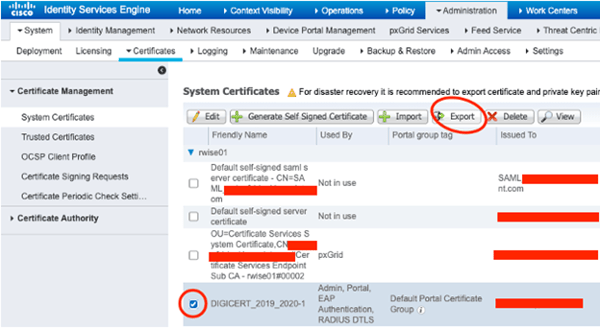
Include those private keys (or you’ll be sooorrrry)!
Alright, alright. On to the next.
Reimage
If you are working with virtual machines and have available compute and storage resources, you can choose to build new nodes in parallel as opposed to reimaging the existing nodes. This is exactly what we will do here! In a small environment, you could even have the old and the new VM’s up on the network at the same time by using new IP/hostname information on your new nodes (controlling your migration by way of repointing all of your RADIUS/TACACS+/PxGrid clients)! In a larger environment, this is not desirable, as you will create loads of additional work during the migration. In our case, we’ll use the same IP/hostname information in order to save that hassle. This means that we’ll follow these high-level steps.
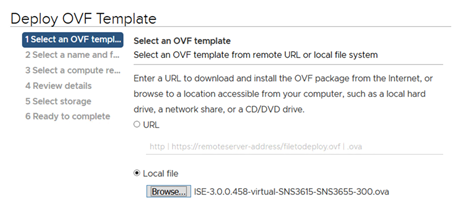
Install new ISE Virtual Machine
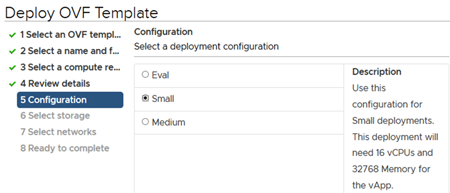
We will install new virtual machines using ISE 3.0 OVA (small in our case). We will run through this twice, once per node. We will power them up when done, but we won’t go into setup just yet.
Deploy the OVF
Our ISE 3.0 deployment using a supported compute/storage build!
Deregister Secondary Node
Here we will deregister secondary node from our ISE 2.4 deployment. We do this to prevent any kind of cluster communication from happening between our nodes on the ISE 2.4 deployment and ISE 3.0 deployment.
Deregister Secondary Node
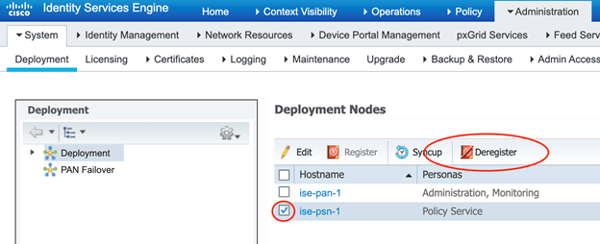
(Note: I know the screenshot shows the deregistration of a PSN! It’s only an example from a different deployment of mine. I forgot to grab the screenshot of my secondary node from the reference deployment of this upgrade!)
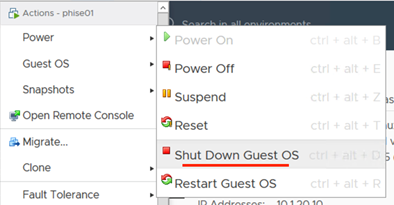
Shutdown ISE 2.4 Secondary Node Virtual Machine
In order to re-use the same IP/Hostname on our new ISE 3.0 node, we need to shut down its ISE 2.4 equivalent.
Shut it Down!
Complete First ISE 3.0 Node Setup
Complete initial setup wizard on one ISE 3.0 virtual machine using IP/hostname information of the previously shutdown ISE 2.4 Secondary Node. This node will be the ISE 3.0 Primary Admin Node (initially, at least).
Type “setup” at the virtual machine console
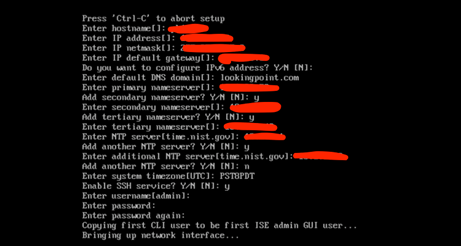
You can see all the information above that you’ll need to be prepared with to complete the setup. Just be sure the use the same IP/hostname/domain-name values as the equivalent ISE 2.4 node. Other values can be updated as you wish! It will take a good thirty minutes to complete the install from here.
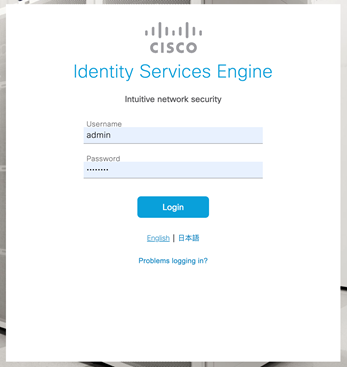
Patch the ISE 3.0 Primary Node
Get ready for the all new ISE 3.0 GUI! Are you excited?! Me too! Clear your browser cache and close browser. Browse to the new ISE 3.0 Primary node in your favorite, supported browser.
Oh, fancy!
New Menu Sandwich!
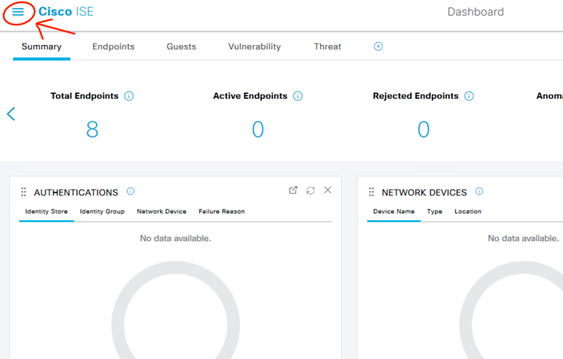
Same Menu Structure!
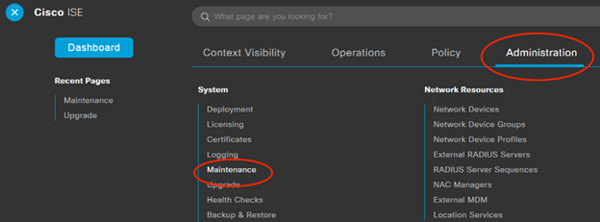
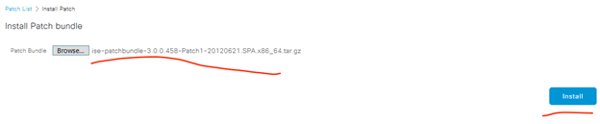
Install the Latest Patch!
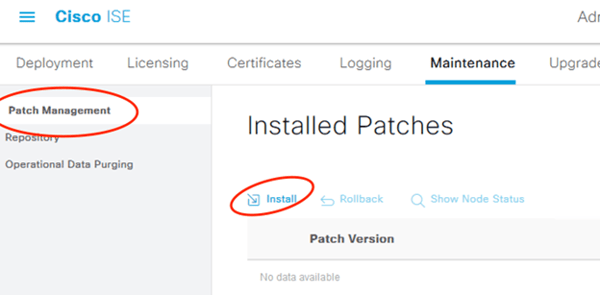
It will upload, log you out, patch itself, then you can keep going. Will take at least thirty minutes.
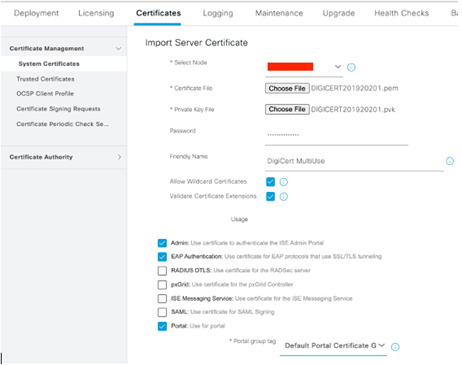
Restore System Certificates to ISE 3.0
After we apply the configuration backup, our new node will be “back in the game” so to speak as far as processing authentications. We haven’t modified any NAD configurations so RADIUS authentications will come our way. As soon as we restore the backup (containing our NAD info), ISE 3.0 will begin responding to those authentication requests. So…before we restore the backup, we want to have as much as we can ready to process them. Of utmost import are the ISE EAP and Portal certificates in regard to serving RADIUS client authentications, so we’ll restore those prior to the configuration restore.
Import the Certificate! Note, import CA Chain to Trusted Certificates first!
Input both the PEM and PVK files along with the password used to protect that private key! Submit!
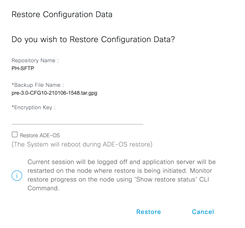
Restore the Configuration Data to ISE 3.0
Time to inform the new of the old! In this step we will import all of the configuration from our ISE 2.4 configuration backup to our ISE 3.0 deployment. Fun fact about ISE: you can restore configuration/operational data backups between different versions!* This will take about 30 minutes.
*As long as those versions are compatible direct upgrade/downgrade paths!
Restore configuration backup to ISE 3.0 node!

Are you sure? YES, Restore!
ISE will kick you out of the GUI during restore!
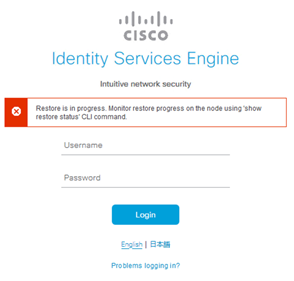
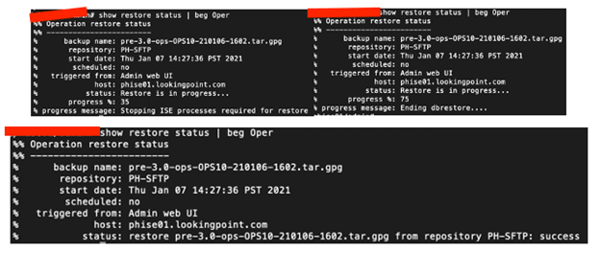
Monitor from the CLI!
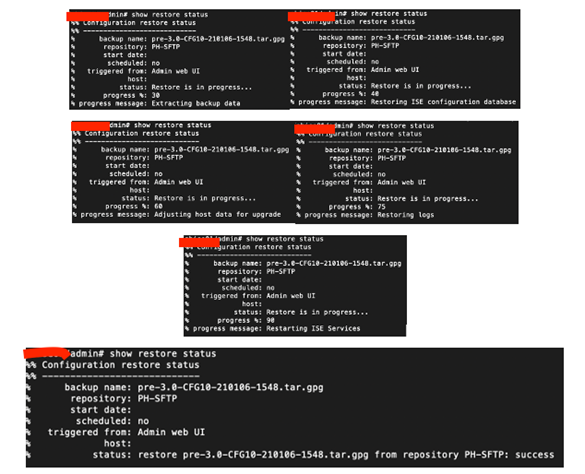
System restarts…now this new node is ready to service clients…no, wait Active Directory! Go on…
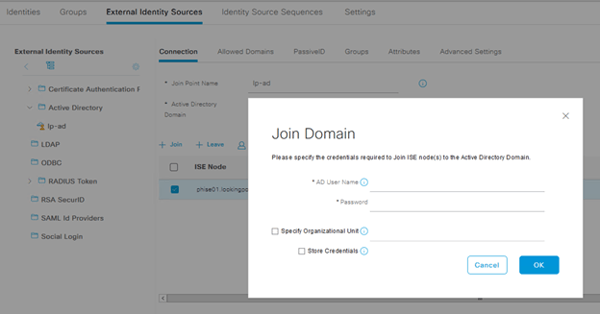
Join the Restored ISE 3.0 Node to AD Domain
If you are like most deployments, you use Active Directory as your Identity Store. You need to rejoin it. Now! Quick! Authentications may be coming in! You need a Domain Admin account to do this (one time entry).
Rejoin AD Domain!
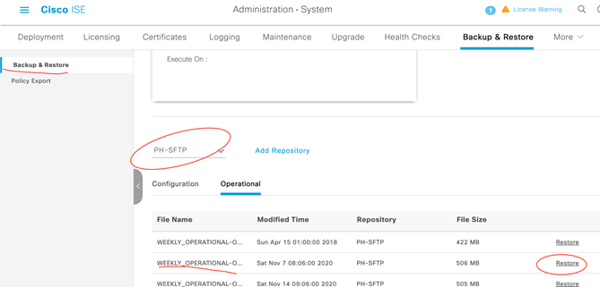
Restore operational backup to ISE 3.0 node
This will restart the application services again, but as long as our NADs have pointers to both our ISE nodes, we’ll be ok. Now, let’s get those old logs back!
Restore the Operation Data Backup!
Restore!
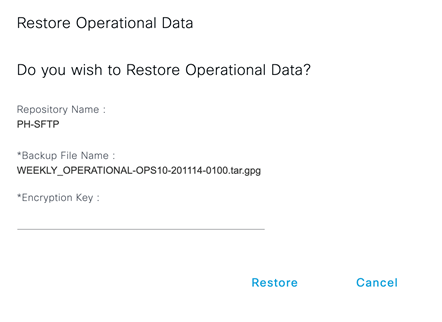
ISE will kick you out of the GUI during restore!
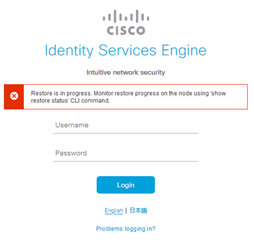
Monitor from the CLI!
Once this operational data restore is complete, this node is ready to go! We will want to validate successful authentications are coming into the ISE 3.0 Primary Node, but then, onto the next!
Shutdown ISE 2.4 Primary Admin Node and Complete Setup on ISE 3.0 Secondary Node
We won’t repeat ourselves here with duplicate work. Go back using these links to complete the following on the second ISE 3.0 node.
|
Steps |
|
Shutdown ISE 2.4 Virtual Machine |
|
Complete Setup on ISE 3.0 Virtual Machine |
|
Apply Patch to ISE 3.0 Node |
|
Restore Certificates to ISE 3.0 Node |
Register ISE 3.0 Secondary Node to Deployment
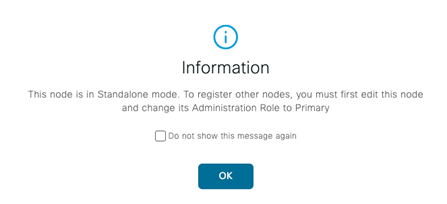
Ok, at this point our ISE deployment is up and running (on one leg!) at version 3.0. Now we need to add that second leg to stand on. First, we need to convert our initial ISE 3.0 node to “Primary” as it is currently “Standalone”. All of the below steps are performed from the initial ISE 3.0 node, which we have been referring to as our ISE 3.0 Primary Node thus far.
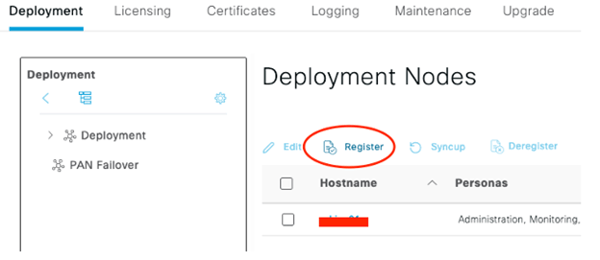
Nice information message when we navigate to Administration > Deployment! Let’s do it!
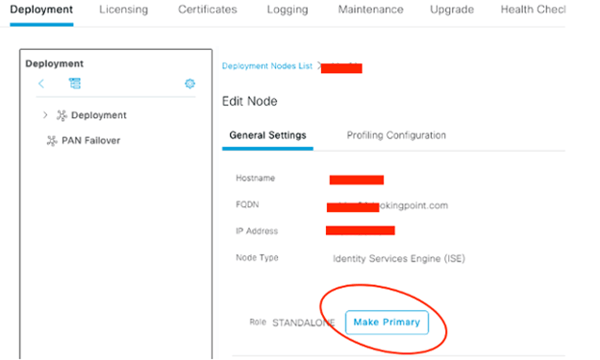
Click the node, Make Primary! Save.
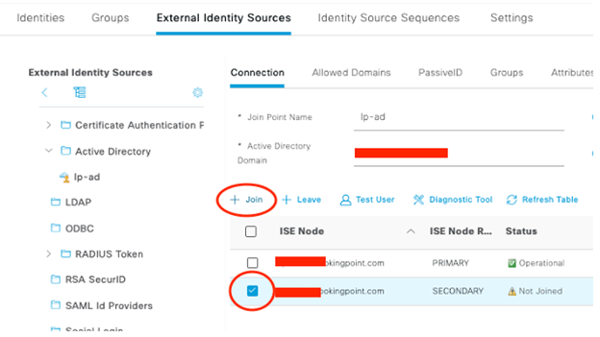
Now Register the Secondary!
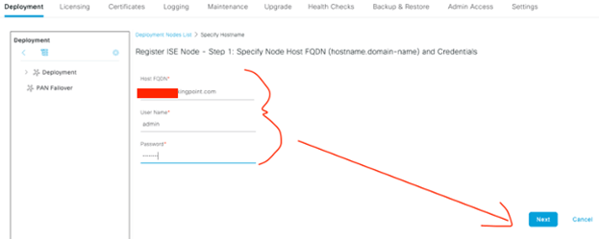
Complete the form, Next!
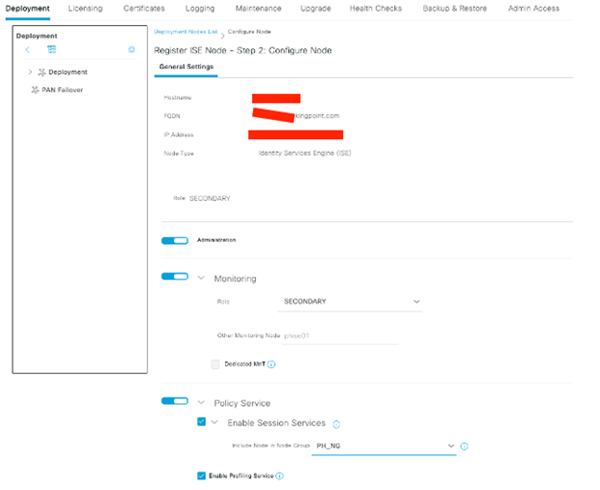
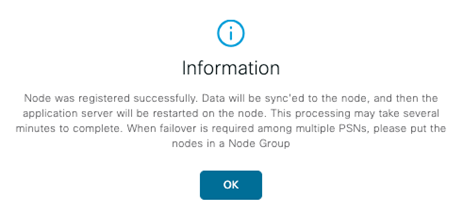
Finalize the Persona selection, Submit!
Give it time to sync..
Check back to make sure you have GREEN CHECKS!

Join ISE 3.0 Secondary Node to Active Directory!
Optional – Flip Primary/Secondary Roles
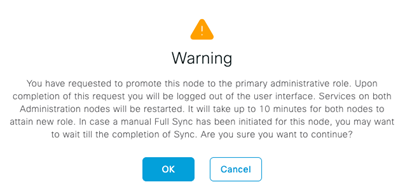
If you want to end up where you started out in terms of Primary/Secondary, proceed with this step. Know that both nodes application services will restart, with only a slight stagger, so there will be an outage.
Login to the Secondary Node GUI and Promote to Primary!
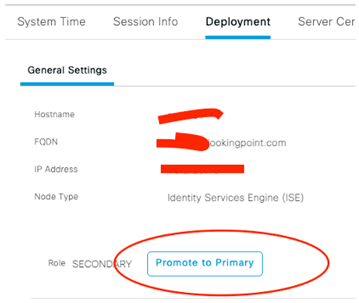
Yes, yes, OK!
After the nodes come back up, onto the last remaining topic of this blog! Finally! Am I Right?!!
Licensing
My favorite, your favorite, I mean who doesn’t like licensing? It’s always so simple to understand, persistent, and fluid. Except NOT! Yes, indeed another licensing curve ball thrown at us by the overlords in a never ending attempt to make this stuff easy (cough…monetizable).
ISE 3.0 New Licensing Model
In ISE 3.0, a new licensing model is introduced for Base, Plus, and Apex license tiers. The new replacements are Essentials (Base), Advanced (Plus), and Premier (Apex). You will recall that Base, Plus, and Apex licenses were mutually exclusive, meaning that Apex didn’t give me functionality provided for in Plus or Base. The new model is nested, so Premier gives you all Advanced and Essentials functionality. I am not a fan of constant licensing changes, but this is a good one IMHO. The below images are taken from this Cisco Documentation on these license changes.
How the licenses migrate from old to new!

Example with counts and expirations!

You’ll note now that even the Essentials level is a subscription. Anything that migrates from your old Base level into the new Essentials level will be given the arbitrary expiration date of October 31st, 2023.
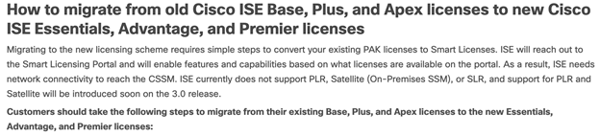
Step 1 – Open a TAC Case
Per the steps outlined in this document (beginning where pictured below), open a TAC case to get your ISE 2.X licenses upgraded to ISE 3.X in your Smart Account.
Step 2 – Register ISE 3.0 to Smart Account
We aren’t walking through the Smart Account administration in this step, rather we are assuming you already have your registration token handy.
Open Registration Details!
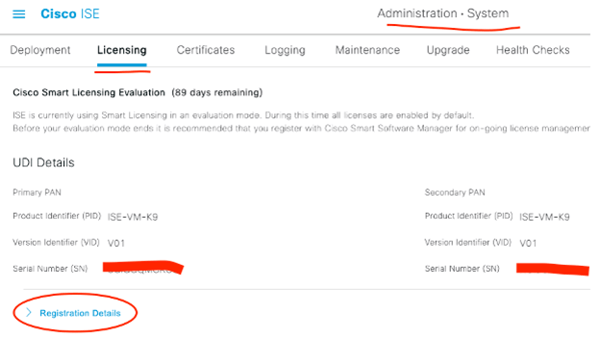
Plug in your token, connection method, license tiers, and click Register!

What’s Next?
We took a detour today off of our scheduled programming to cover this major upgrade. Mainly because I had to get it done and thought, why not document it? Next, we’ll look to continue on our TrustSec track, covering enforcement. Hope you enjoy your new ISE 3.X GUI!!
As always if you have any questions on getting Cisco's ISE set up for you and your business and would like to schedule a free consultation with us, please reach out to us at sales@lookingpoint.com and we’ll be happy to help!

Want the answers to the most asked questions about ISE? Check out our video below!
Dominic Zeni, LookingPoint Consulting Services SME - CCIE #26686