


The Meraki dashboard is phenomenal in my opinion. With next to no effort on your part, you have a LOT of data at your fingertips. What if you want that data available for easy export, or if you want to access data older than 30 days old? I ran into just that scenario and found that on top of the GUI, Meraki provides a pretty fantastic API with access to even MORE data. Let me show you how to access it using Postman.
Here’s what you’ll need:
API Access enabled under your Organization/Settings

A generated API key (Click on your username at the top-right of your Meraki portal, & select “My Profile”)

A Postman account (postman.com)
Quick tangent on Postman before we move on. Here’s what I like about Postman – It’s a cloud-based GUI with a short learning curve (in my opinion) which gets you API data quickly. Additionally, you can find collections of pre-built API calls for another shortcut saving you the headache of all those syntax errors that I’ve become familiar with when working with API’s, AND you can create a workspace and invite your colleagues so everyone can get access to the work and data. Before using postman, I attempted to teach myself python enough to make API calls, then figure out how to get that data in a readable format for me to use (MUCH longer learning curve). There are absolutely use cases where that is a better fit, but for our purposes, let’s focus on getting the data quickly. If this is the first you’re hearing of postman, I’d suggest looking for a postman intro video or primer video to get up to speed and then create your free account.
Let’s get started!
After logging in to your postman account, add a collection using the pre-built Meraki Dashboard API:
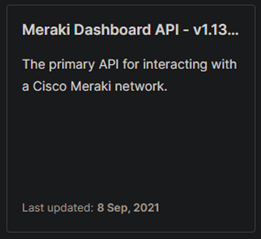
2. Click on the Meraki Dashboard API
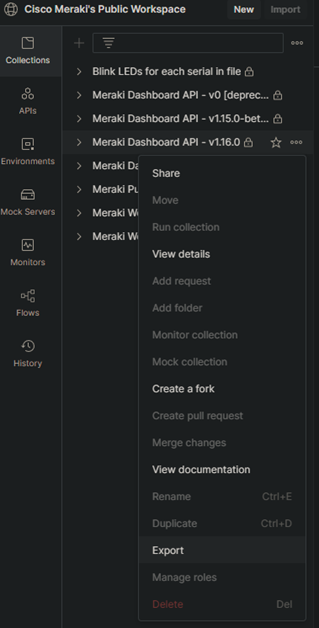
3. Click the 3 dots next to the latest non-beta collection & select export
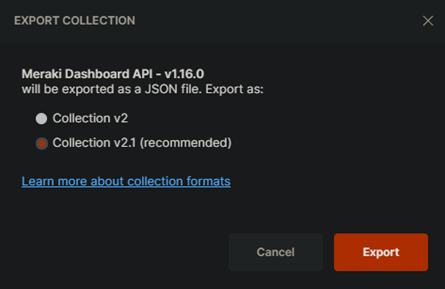
4. This should export a .JSON file
5.Note where you saved it & the file name, next we’ll import it.
Now, go back to your own Postman workspace, and click on import, then upload files

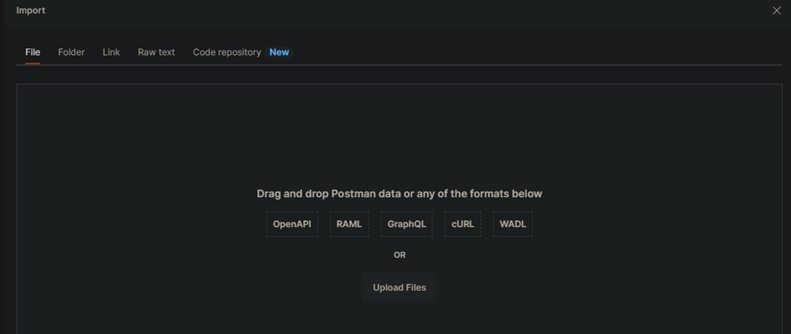
Select the file you just downloaded

It might take a minute or two, but it will now show up as a collection

When you click on the collection, you should see the following
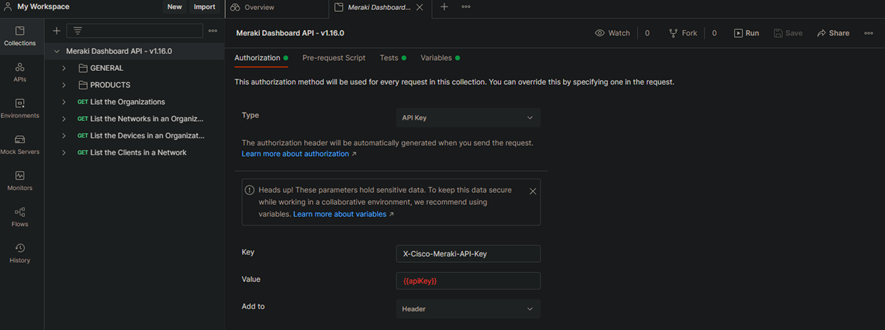
I’ll show you how I set up my variables, but please click on the “Learn more about variables” link to get a good understanding of global, environment, local, and shared variables so you don’t accidentally share your API key with your teammates.
Go to Environments on the left and create an environment (I called mine Meraki), then add a new variable called “apiKey” (case sensitive to match the variable in the screenshot above). I put my own API key in the Current Value field so it’s only for my use, not anyone I’m sharing with. I use the initial value for any variables I want to share with my team. MAKE SURE TO HIT SAVE (top right) AFTER EVERY EDIT!

Then go up to the top right & set your environment to what you just created from the dropdown.

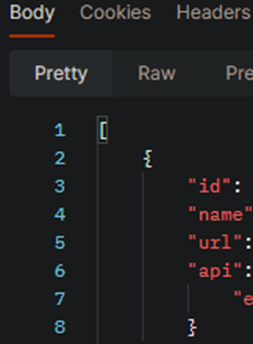
Let’s try our first API call. Select the List the Organizations on the left & click the blue send button.

Down at the bottom, you should see the Body show results with an id, name, url, api, & enabled. If you don’t see that, it should give you some indication of what went wrong (such as incorrect API key, and if that’s the case, check for leading or trailing spaces, or try creating a new API key (you can have up to 2).
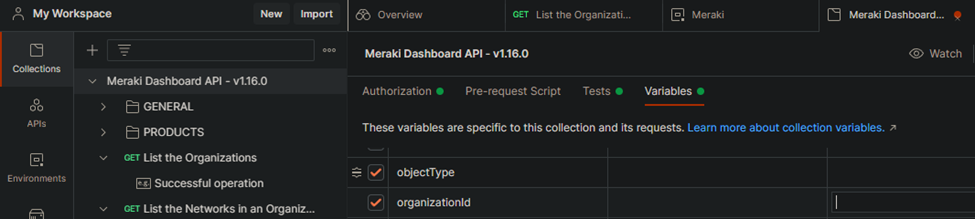
Congratulations! You just got some information via API! Let’s get just a little more though. Copy the id from the body (just the numbers between the double quotes) and over on the left, select the Meraki Dashboard API & go to the variables, then scroll down until you find organizationId, and paste to either the initial (to share it) or the current (to keep it private) and remember to click save.
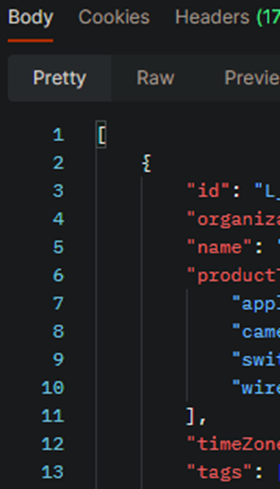
Now, let’s select the List the Networks in an Organization. If you look at the bottom right, you can see that organizationId is Required. Good thing we just set that value! Click Send and let’s see what happens next.

Hopefully, down in the Body, you’re seeing some information about all your networks like the image below.
From this point, you can play with the variables and the other API calls like List the Devices in an Organization. One thing you could try is taking one of the listed productTypes like “wireless” and setting that in the productType variable to see what results you get as compared to setting the variable to “switch”.
Once you have the data you’re after, try copying the results (there’s a copy icon over on the right next to search) & paste into a converter tool like at convertcsv.com to get a .csv file instead of raw JSON output.

Hopefully this was a nice peek into the world of API calls and gives you another way to get data from Meraki. You don’t have to stop at what’s available here, you can adjust, edit, and create API calls all you want. My hope is the more you explore, the more possibilities open up and the more you find you’re able to do. A really good feeling is when the effort pays off and you find that being able to make API calls helps you or a colleague get your work done faster. H[API] Hunting
It just so happens that LookingPoint offers multiple IT services if you’re interested. Want more information, give us a call! Please reach out to us at sales@lookingpoint.com and we’ll be happy to help!

Ryan Alibrando, Managed Services Team Lead