


If you have Meraki MX security appliances chances are that you have seen the SD-WAN & traffic shaping option in the Meraki dashboard menu. Software-defined WAN (SD-WAN) can dynamically optimize your WAN without having to make manual adjustments when network conditions change. In a network with redundant uplinks if one uplink becomes degraded, SD-WAN allows the network to dynamically select the best path to the destination. This is especially important for latency sensitive services such voip and video. Meraki’s philosophy has always been about simplicity and their SD-WAN solution is no different.
Prerequisites
Before enabling Meraki SD-WAN there are some prerequisites we must first meet:
- Meraki SD-WAN is built around MX security appliances and AutoVPN. It is not compatible with other SD-WAN solutions from other Vendors. MX appliances must be used at all sites.
- For SD-WAN to function, each location must have multiple uplinks.
- All MX appliances participating in SD-WAN must be registered to the same organization.
- Meraki SD-WAN uses AutoVPN and internet circuit to form the WAN. A workaround is needed to use AutoVPN over dedicated private WAN circuits and is used primarily for failover and not intended for SD-WAN. This is not covered in this guide.
Enabling SD-WAN
Meraki has simplified the deployment of SD-WAN. To enable SD-WAN only requires a few easy steps.
1. Check for multiple uplinks
Go to Security & SD-WAN > Monitor > Appliance Status
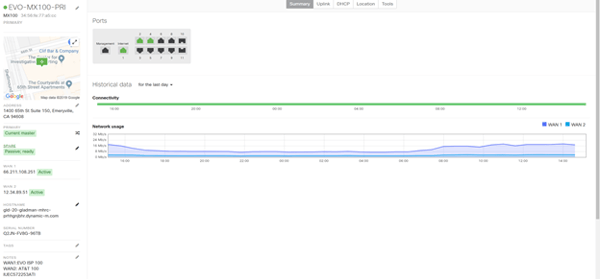
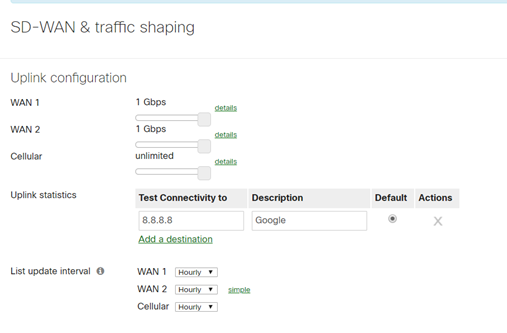
Adjust the actual speed of the circuits in Security & SD-WAN > Configure > SD-WAN & traffic shaping.
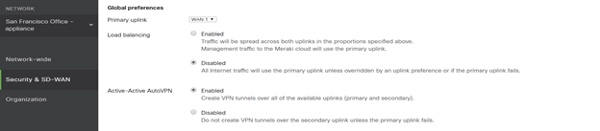
2. Enable Active-Active AutoVPN.
In Security & SD-WAN > SD-WAN & traffic shaping under Uplink>Global preferences enabled Active-Active Auto VPN
3. Enable AutoVPN
In Security & SD-WAN >Site-to-Site VPN, select Hub for the hub site. For a full mesh all remotes sites will be selected as hubs as well.
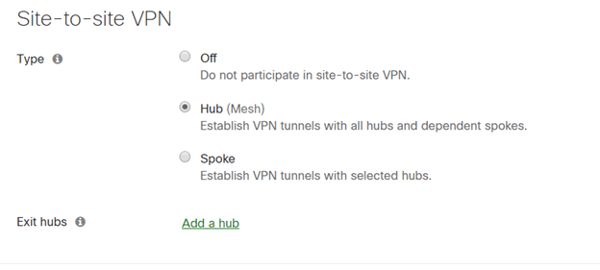
For a Hub and Spoke topology, select the spoke for the remote sites and then select the dedicated hub(s).
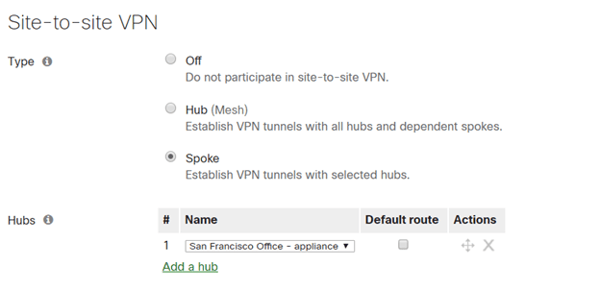
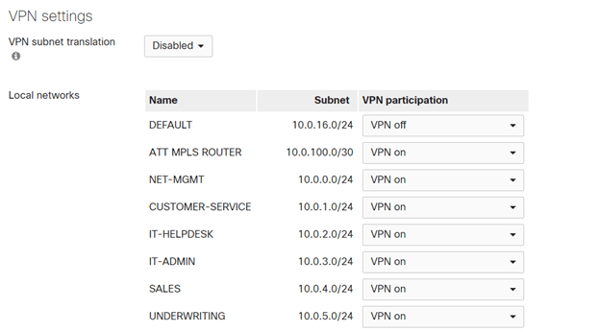
4. Advertise Networks in VPN
Select whether to advertise the local networks by turning on or off VPN participation
5. Check VPN Status and metrics
In Security & SD-WAN >Monitor>VPN Status
This page shows all the VPNs connected to this site. Here you can check average latency and usage. You can also find the uplink decision for each remote site and the SD-WAN policy it is using for the uplink decision.
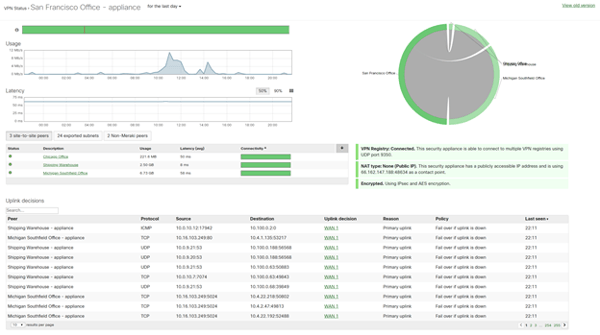
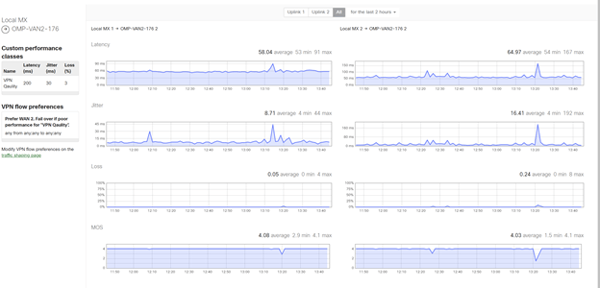
Highlight a remote site and click on the connectivity bar on the right to see more statistics for the uplinks. This next page will show the Latency, Jitter and Packet Loss for both uplinks. It also provides a MOS score for VOIP. Using the information from this page flow preferences and SD-WAN polices can be configured

6. Configure SD-WAN Polices
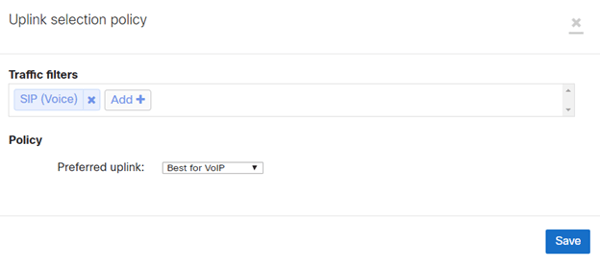
To create a SD-WAN uplink policy chose Add a Preference under SD-WAN policies and VPN traffic.
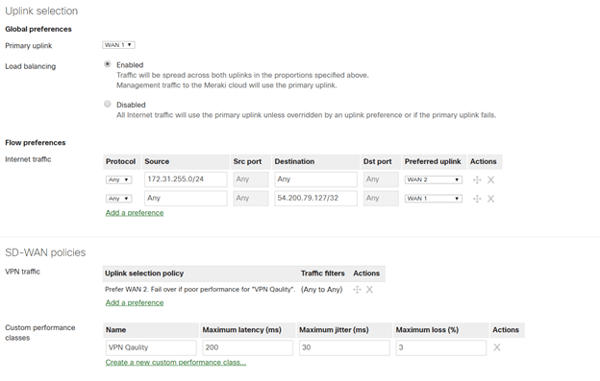
Here we can create a policy for voice traffic and the Preferred uplink is Best for Voip. SD-WAN will use the MOS score in the VPN status page to select the best path for voice traffic.
We can also create a Policy that favors a specific WAN connection and if performance becomes poor than failover over to another WAN connection. This is based on a Performance class which uses maximum latency, jitter and loss to determine when to failover over.
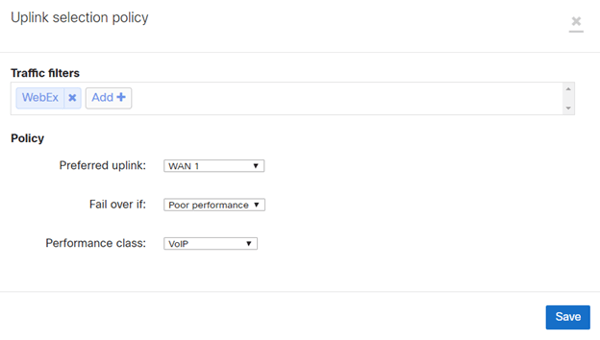
We can also create custom performance classes for use in the SD-WAN policies.

As always if you have any questions on any of the Meraki solutions above or would like to schedule a demo, please reach out to us at sales@lookingpoint.com and we’ll be happy to help!

Written By: Rick Wong, LookingPoint Principal Network Architect