


I couldn’t find a guide online for a particular WebEx Calling scenario; we wanted to use a local gateway to bridge our on-prem CUCM with WebEx calling without the need for PSTN. The local gateway would just route calls from on-prem to the cloud and vice versa. Each service would offer its own PSTN for the endpoints registered to it. Here’s how we accomplished it!

Unified CM side settings (30x)
- Incoming dial peer (dial-peer voice 300 voip)
- Outgoing dial peer (dial-peer voice 301 voip)
- Dial peer group (voice class dpg 300)
- Tenant (voice class tenant 300)
- Tenant (voice class tenant 301)
- URI (voice class uri 300)
- Server group (voice class server-group 301)
Webex Calling Cloud Side Settings (20x)
- Incoming and Outgoing dial peers (dial-peer voice 200201 voip)
- Dial peer group (voice class dpg 200)
- SIP profile (voice class sip-profiles 200)
- Tenant (voice class tenant 200)
- STUN (voice class stun-usage 200)
- URI (voice class uri 200)
Local Gateway (vCube)
- Cisco CSR 1000v Series Cloud Services Router
In the end our configuration will look something like this:

First, we’ll begin with our Unified CM server group settings (voice class server-group 301). This will be the server group that will be sending our SIP INVITES to from WebEx calling. Here we’ll set the IP address and port number to our Unified CM server(s).
Note: We change from the default port of 5060 to 5065. This is done to incase there is a need for additional SIP trunks on the local gateway. When adding the trunk to Unified CM you’ll need to update the Security Trunk Profile to reflect the new port.
Server group settings (voice class server-group 301)

Next, we’ll set up our tenant settings (voice class tenant 301). This will be used to associate our outgoing dial peer for Unified CM.
Note: The bind command sets the interface to connect to Unified CM. In our scenario we’ll be using a virtual router with a single interface.
Tenant settings (voice class tenant 301)

Now let’s create an outgoing dial peer for Unified CM. Here we’ll associate our server group (server-group 301) and tenant (tenant 301). We’ll also associate a codec class to this dial-peer as well as adding SIP OPTIONS PING with keepalives.
Note: The destination-pattern command is required on the outbound dial peer even though matching is not done based on this command.
Codec settings (voice class codec 99)

Note: We’ll also be using this codec class for the WebEx configuration later.
Outgoing dial peer configuration (dial-peer voice 301 voip)

Next, we’ll set up dial peer group 300 to select the outgoing dial peer 301 we created in the previous step.
Note: this references dial-peer 200201 which we’ll be creating as the inbound dial-peer in a later step.
Destination dial peer group settings (voice class dpg 300)

Now we’ll move on to the WebEx calling side of our configuration.
WebEx Calling requires TLS 1.2 for registration to the cloud. For this will need to set up a pre-shared key, DNS and a trust point. Let’s start with the pre-shared key encryption.

Next verify that DNS is working.

Now will set up a trust point to use TLS 1.2 with SIP.

Let’s set up and verify the trust pool.
Trust pool settings
First, we need to make sure the trust pool is already set. Note if nothing is returned after issuing the command, it is not set.

We’ll need to download the certificate from Cisco.

Let’s verify that is now there

Now we’ll set up our voice services. Note: You’ll need to check the Port Reference for the latest information. You may need to also add your Unified CM subnet to the trusted list.

Now let’s move on to our sip profile, codec class, STRP, STUN and tenant settings for WebEx calling. Many of these settings will come from Control Hub. For more information on how to create a trunk in Control Hub refer to this link. After creating the trunk, Control Hub should display the settings needed in the next step.
The SIP profile is primarily used to translate SIP messages from sips: to sip:
SIP Profile (voice class tenant 200)

We’ll be using the same voice class codec 99 from above.

SRTP and STUN settings
Set the SRTP and STUN for the codec and WebEx Calling. G711ulaw is set as the codec for the US. If you want to use the call flow that utilizes media path optimization, stun usage ice lite is required (IOS-XE 16.12.5 or higher).

Now that we have all of that configured, let’s move on to our tenant settings.
Tenant settings (voice class tenant 200)

To identify incoming calls from the cloud we’ll use a voice call uri. The SIP INVITE Request-URI sent from the WebEx Calling cloud to the local gateway contains a dtg parameter that we generated in Control Hub. Our local gateway will be looking for an INVITE that looks something like this:
Example:
INVITE sip: +19256553480@192.168.43.197:5061;transport=tls;dtg=lgw12345_lgu SIP/2.0
We’ll use this to match any invite coming in from WebEx.
Note: You’ll need to replace any underscores with periods in the pattern dtg command.
Trunk Group OTG/DTG (voice class uri 200 sip)

Now we’ll create a single dial peer for inbound and outbound calling to the cloud. We’ll associate the voice class uri 200 created earlier, as we’ll as the destination dial peer group 300. We’ll also add the voice class codec 99, voice class stun-usage 200 and voice class sip tenant 200.

Next, we’ll create a dial peer group (voice class dpg 200). This will be linked later to then incoming dial peer.

To identify incoming calls from Unified CM we’ll set a pattern to match port 5065.

Next, we’ll create a voice class tenant (voice class tenant 300) to be associated with the incoming dial peer for Unified CM. Just like before the bind command set the interface to connect to Unified CM.
Tenant settings (voice class tenant 300)

Lastly, we’ll create an incoming dial-peer from Unified CM for WebEx Calling. We’ll then associate the dial peer group (dpg 200), URI (uri 300) and the tenant (tenant 300).

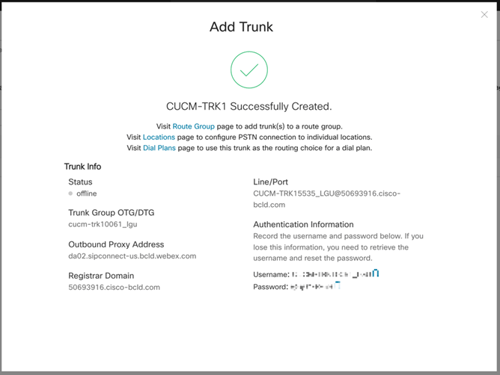
The final step is to add a SIP trunk to our local gateway in Unified CM. Here’s what you’ll need:
SIP security profile settings
Set the SIP security profile to change the SIP send / receive port of the SIP trunk for the local gateway from the default 5060 to 5065.
Navigate Cisco Unified CM Management > System > Security > SIP Trunk Security Profile.
Copy and rename the Non-Secure SIP Trunk Profile and set the following:
- [Incoming Port]: 5065
SIP profile settings
Create a SIP profile to associate with the SIP trunk for the local gateway.
Cisco Unified CM Management > Device > Device Settings > SIP Profile
Copy and rename the Standard SIP Profile (for example, Webex Calling SIP Trunk Profile) and set the following:
- [Early Offer support for voice and video calls]: Best Effort (no MTP inserted)
- Enable OPTIONS Ping to monitor destination status: Check
SIP trunk configuration
Configure a SIP trunk for the local gateway.
Cisco Unified CM Management > Device > Trunk
Create a new SIP trunk and configure the following:
- Destination Address: IP address of the local gateway
- [Destination Port]: 5060
- SIP Trunk Security Profile: SIP Trunk Security Profile created above
- SIP Profile: SIP Profile created above
And with that you should have a solution to route calls between the two services!
As always if you have any questions deploying a local gateway and would like to schedule a free consultation with us, please reach out to us at sales@lookingpoint.com and we’ll be happy to help!

Jeremy Worden, Senior Unified Communications Engineer